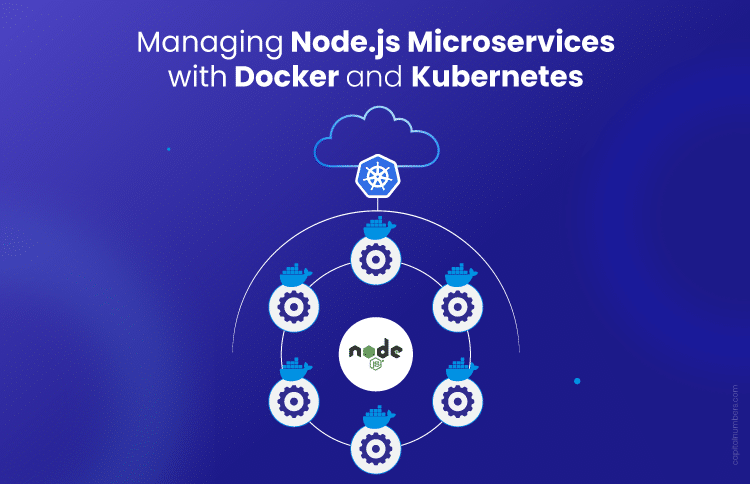
A Guide to Managing Node.js Microservices with Docker and Kubernetes
Table of Contents
Have you ever spent hours troubleshooting why your Node.js microservices work perfectly in development but fail in production? It’s a frustrating experience – one minute, everything runs smoothly, and the next, you’re dealing with unexpected issues across environments.
And what about scaling? When traffic spikes, do you struggle to quickly scale your resources, leading to delays or downtime?
This is where Docker and Kubernetes come in to simplify your life. Docker ensures that your services behave consistently across development, staging, and production environments, while Kubernetes automates deployment, scaling, and monitoring, taking the burden off your shoulders.
Together, these tools solve the major challenges of managing Node.js microservices, making deployment and scaling seamless, reliable, and hassle-free.
Want to learn more about how these tools can help you? Here’s a detailed look.
What Are Microservices, and Why Should You Care?
Ever struggled to scale or update a big, complex app without everything breaking?
Monolithic apps, where everything is tightly packed into one unit, can become difficult to manage as they grow. Trying to scale, update, or fix issues in a large app can slow you down and cause problems.
Microservices change how you manage and scale applications.
What Are Microservices?
Instead of having one large, complex application, microservices break your app into smaller, independent services. Each service handles a specific task, such as managing user logins, processing payments, or storing data. This modular approach makes it easier to update, scale, and maintain each part of your app without affecting the rest.
Microservices are part of a broader architectural style known as Service-Oriented Architecture (SOA). While SOA focuses on large-scale, enterprise-level systems where different services communicate and rely on centralized management, microservices take this concept further. They break down services into smaller, more focused units that can be independently deployed, scaled, and updated. This makes microservices more flexible and easier to manage than traditional SOA systems.
Why Node.js for Microservices?
Node.js is a great fit for microservices integration because of its event-driven, non-blocking I/O model and single-threaded architecture. This design allows Node.js to handle many requests simultaneously without blocking other operations. Node.js can efficiently manage high volumes of I/O-bound requests by leveraging asynchronous programming, making it an excellent choice for scaling microservices.
In short, microservices let you break your app into smaller, more manageable pieces, and with Node.js, you get a fast and scalable solution to power those pieces.
You May Also Read: How We Built Complex Solutions with Node.js: Proven Use Cases
Challenges in Managing Node.js Microservices
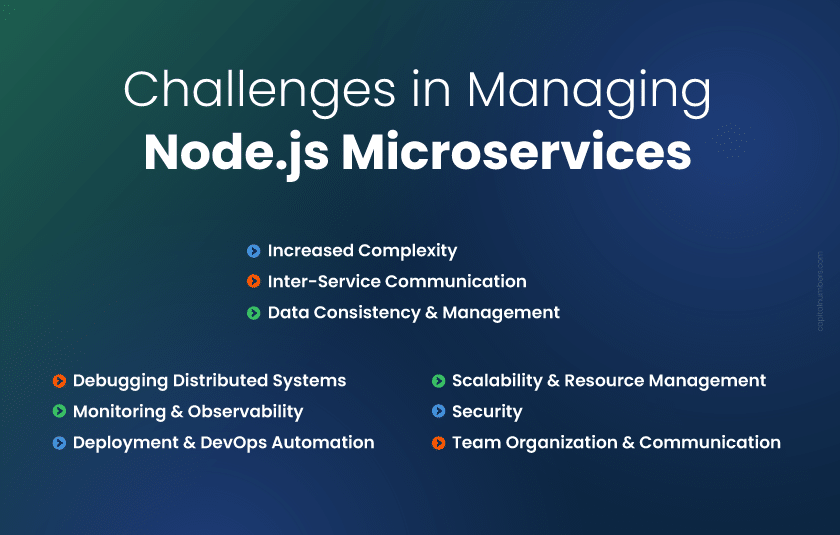
Managing Node.js microservices can quickly become complex as your app grows. Here are the main challenges developers face:
Increased Complexity
As you add more microservices, the overall architecture becomes harder to manage. The process of coordinating each service and ensuring they all work seamlessly together can become difficult.
Inter-Service Communication
Microservices communicate through APIs or messaging queues, and ensuring smooth communication is crucial. Service Meshes (e.g., Istio, Linkerd) simplify this by providing traffic management, security, and observability, easing the burden on developers.
Data Consistency and Management
With each microservice potentially using its database, maintaining data consistency across services becomes a challenge. Without the right strategy, you might end up with mismatched data or synchronization issues.
Debugging Distributed Systems
Debugging is much harder in a microservices architecture. When something goes wrong, tracking down the root cause can be time-consuming, as it’s not always clear which service is the problem.
Monitoring and Observability
Keeping track of multiple microservices in different environments is difficult without proper monitoring tools. You need to gather insights into service health, performance, and any potential issues in real-time.
Deployment and DevOps Automation
Deploying several microservices to different environments manually can introduce errors. A streamlined Node.js microservices deployment process, using automation, is critical for avoiding mistakes and ensuring services are up-to-date and functioning properly.
Scalability and Resource Management
Scaling microservices effectively, especially during traffic spikes, requires careful resource management. Without the right tools, you risk overloading some services while underutilizing others, causing poor performance or downtime.
Security
Each new microservice increases the potential attack surface. Managing access, securing communication, and ensuring each service is protected from threats becomes more difficult as the number of services grows.
Team Organization and Communication
As the number of services increases, teams need clear communication and coordination. Working with multiple services requires alignment between different teams to ensure smooth development and maintenance.
Docker and Kubernetes address these challenges. How? Check it in the section below.
How Docker Solves Node.js Microservices Management Issues?
Deploying the same app on the local machine and in production often results in ‘It works on my machine’ problems.
One of the most common issues developers face is the difference between local and production environments. It works perfectly on your local machine, but once you deploy it to production, problems arise. This is known as the “It works on my machine” problem.
Docker ensures that Node.js microservices run the same way in every environment – on your local machine, in staging, or in production.
Here’s how Docker helps:
Step 1: Setting Up Docker for Node.js Microservices
The first step is installing Docker and setting up your Node.js service inside a Docker container. This ensures consistency across environments. Docker containers package your application with everything it needs to run – code, runtime, libraries, and dependencies – so the app behaves the same way everywhere.
Step 2: Creating the Dockerfile for Node.js
Next, you’ll need a Dockerfile to containerize your Node.js microservice. A Dockerfile is a text file with instructions that tell Docker how to build your container. Here’s an example of a multi-stage Dockerfile to containerize a Node.js service for development and production environments:
# Build stage
FROM node:14 AS build
WORKDIR /app
COPY package*.json ./
RUN npm install
COPY . .
RUN npm run build
# Production stage
FROM node:14
WORKDIR /app
COPY --from=build /app /app
EXPOSE 3000
CMD ["node", "server.js"]
This file does the following:
- FROM node:14: Uses the official Node.js image as the base image.
- WORKDIR /app: Sets the working directory inside the container.
- *COPY package.json ./**: Copies the package.json files into the container.
- RUN npm install: Installs the dependencies.
- COPY . .: Copies the rest of the application code into the container.
- EXPOSE 3000: Exposes port 3000 for the app.
- CMD [“node”, “server.js”]: Runs the Node.js application.
In this multi-stage build:
- The build stage installs dependencies and prepares the application for production.
- The production stage copies only the necessary files from the build stage, reducing the final image size by excluding unnecessary development dependencies.
By using multi-stage builds, Docker optimizes the production image, resulting in a smaller and more secure container that only includes what’s necessary for running the app.
Step 3: Running the Docker Container
Once the Dockerfile is ready, you can build and run the container using these commands:
docker build -t node-microservice .
docker run -p 3000:3000 node-microservice
The docker build command creates the container image, and docker run starts the container, mapping port 3000 to your local machine. This ensures that your app is deployed the same way every time, effectively.
Managing Microservices with Docker allows you to replicate your environment easily. It reduces the deployment issues and ensures consistency across all stages of development.
Build Robust Applications with Our Expert Developers
Whether you want to create data-driven, real-time applications, serverless Node.js microservices, or enterprise-level web applications, our skilled Node.js developers have the expertise to deliver high-performance solutions.
Contact Us Today to Hire Expert Node.js Developers!
Kubernetes: How to Scale and Manage Microservices?
When traffic spikes, my app goes down, and scaling manually takes forever.
Scaling microservices efficiently is a challenge, especially when traffic spikes unpredictably. When your app’s popularity increases, you don’t want it to crash just because it can’t scale fast enough.
Kubernetes for Node.js provides the perfect solution by automating the scaling process, ensuring your microservices can handle traffic spikes without downtime. Microservices architecture with Kubernetes can handle horizontal scaling and auto-scaling, so you can focus on building your app, not managing infrastructure.
Here’s how Kubernetes helps:
Step 1: Kubernetes Setup for Node.js Microservices
To get started with Kubernetes, you first need to set up a Kubernetes cluster. Kubernetes makes it easy to deploy and manage your microservices in a distributed environment. Once you have Kubernetes running, you can deploy your Node.js microservices with ease.
Step 2: Kubernetes Deployment YAML
Kubernetes uses YAML files to define the configuration for deploying microservices. Here’s an example of a Kubernetes deployment for Node.js that ensures your Node.js microservice is deployed with 3 replicas for high availability, along with health checks to ensure proper monitoring in production environments:
apiVersion: apps/v1
kind: Deployment
metadata:
  name: node-microservice
spec:
  replicas: 3
  selector:
    matchLabels:
      app: node-microservice
  template:
    metadata:
      labels:
        app: node-microservice
    spec:
      containers:
      - name: node-microservice
        image: node-microservice:latest
        ports:
        - containerPort: 3000
        livenessProbe:
          httpGet:
            path: /health
            port: 3000
          initialDelaySeconds: 3
          periodSeconds: 5
        readinessProbe:
          httpGet:
            path: /readiness
            port: 3000
          initialDelaySeconds: 5
          periodSeconds: 10
This YAML file:
- apiVersion: Specifies the Kubernetes API version.
- kind: Deployment: Defines the deployment type.
- replicas: Specifies the number of instances (3 replicas in this case) of your service to run.
- containers: Defines the Node.js container that will run inside the pod.
- livenessProbe: Ensures the container is still healthy and restarts it if necessary.
- readinessProbe: Ensures the container is ready to serve traffic, preventing traffic from being routed to an unhealthy container.
This setup helps ensure high availability and reliability by distributing your Node.js service across multiple replicas and including health checks for better service management.
Helm Charts for Simplified Kubernetes Deployments
For beginners or teams managing multiple deployments, Helm charts can simplify the entire process. Helm is a package manager for Kubernetes that helps you define, install, and manage Kubernetes applications using reusable templates (called charts).
Helm charts take care of the complex configurations for deploying microservices, making it easier to manage large-scale applications without needing to write and maintain numerous YAML files manually. By using Helm, you can deploy Node.js microservices with a single command and customize them easily.
Here’s how you can use Helm for your Node.js microservices:
Create a Helm Chart:
Helm lets you create a new chart with a simple command:
helm create node-microservice
Install the Chart:
Once the chart is ready, you can deploy it with:
helm install node-microservice ./node-microservice
Helm abstracts much of the complexity of Kubernetes, especially for new users, by providing a consistent and repeatable deployment process.
Step 3: Exposing the Service
Once the microservice is deployed, you need to expose it to external traffic. Kubernetes makes this easy with a Service YAML configuration. Here’s an example to expose the service using a LoadBalancer:
apiVersion: v1
kind: Service
metadata:
  name: node-microservice-service
spec:
  selector:
    app: node-microservice
  ports:
    - protocol: TCP
      port: 80
      targetPort: 3000
  type: LoadBalancer
This file does the following:
- selector: Ensures traffic is routed to the correct microservice.
- ports: Maps the service’s port (80) to the container port (3000).
- type: LoadBalancer: Exposes the service to the outside world, allowing it to handle traffic from users.
Auto-Scaling and Horizontal Scaling
Kubernetes handles horizontal scaling, where you can scale the number of replicas of your microservice as traffic increases. For example:
kubectl scale deployment node-microservice --replicas=5
This command scales the number of replicas from 3 to 5, ensuring that the service can handle more requests.
Also, Kubernetes’ Horizontal Pod Autoscaler (HPA) can automatically adjust the number of pods based on CPU usage or memory consumption. For example:
kubectl autoscale deployment node-microservice --cpu-percent=50 --min=1 --max=10
This ensures that Kubernetes will scale the service up or down based on resource usage, keeping your application responsive without manual intervention.
Scale Seamlessly with Our Comprehensive Kubernetes Services
From setting up resilient Kubernetes environments to ongoing management and support, our experienced team ensures your cloud-native applications run smoothly and scale effortlessly.
Contact Us Today for Kubernetes Consulting and Managed Services!
How to Manage Sensitive Data in Node.js Microservices?
Managing environment variables and sensitive data for microservices is a pain. How to avoid hardcoding sensitive data?
Handling sensitive data in Node.js microservices can be difficult, especially when it’s hardcoded in the code. It makes things harder to maintain and raises security concerns.
What to do?
Kubernetes has an easy way to securely store sensitive data using ConfigMaps for environment variables and Secrets for things like passwords. This keeps your code clean and secure.
Example: Kubernetes ConfigMap for Environment Variables
You can use ConfigMaps to store non-sensitive data like environment variables. Here’s an example:
apiVersion: v1
kind: ConfigMap
metadata:
  name: node-config
data:
  NODE_ENV: "production"
  DB_HOST: "localhost"
ConfigMaps let you keep environment-specific settings separate from your app’s code.
Example: Kubernetes Secrets for Sensitive Information
For passwords and other sensitive data, Kubernetes Secrets are the way to go. Here’s how you can store a password securely:
kubectl create secret generic db-password --from-literal=password=supersecret
Kubernetes makes sure sensitive data stays encrypted and secure.
CI/CD Pipelines with Docker and Kubernetes
Want faster, more reliable deployments?
CI/CD pipelines with Docker and Kubernetes automate the testing, building, and deployment of your Node.js microservices.
You can use GitHub Actions, Jenkins, or GitLab CI to trigger the pipeline when you push code. After the code passes tests, Docker builds the image, pushes it to a container registry, and Kubernetes automatically pulls the updated image for deployment.
Here’s an example of a basic GitHub Actions pipeline:
name: CI/CD Pipeline

on:
  push:
    branches:
      - main

jobs:
  build:
    runs-on: ubuntu-latest
    steps:
      - uses: actions/checkout@v2
      - name: Set up Docker
        uses: docker/setup-buildx-action@v1
      - name: Build and push Docker image
        run: |
          docker build -t my-app .
          docker push my-app
      - name: Deploy to Kubernetes
        run: kubectl apply -f k8s/deployment.yaml
In this pipeline:
- GitHub Actions triggers the pipeline when changes are pushed to the main branch.
- Docker builds and pushes the image.
- Kubernetes deploys the latest image.
Integration Testing
You can add integration tests to ensure that microservices work together correctly. For example:
jobs:
integration-tests:
runs-on: ubuntu-latest
steps:
    - name: Run integration tests
    run: |
        docker run my-app npm run test-integration
Blue/Green Deployment Strategy
Implementing blue/green deployments ensures zero-downtime releases. You deploy the new version (green) while the old version (blue) is still running. Once green is tested, switch traffic to it using:
kubectl set image deployment/my-deployment my-container=my-app:latest --record
Alternative CI/CD Tools
While GitHub Actions is great, Jenkins and GitLab CI offer more flexibility:
- Jenkins: Highly customizable and integrates well with Docker and Kubernetes.
- GitLab CI: Integrated CI/CD directly within GitLab for Docker and Kubernetes deployments.
Here’s a simple Jenkins pipeline:
pipeline {
    agent any
    stages {
        stage('Build') {
            steps {
                script {
                    docker.build('my-app')
                }
            }
        }
        stage('Deploy') {
            steps {
                script {
                    sh 'kubectl apply -f k8s/deployment.yaml'
                }
            }
        }
    }
}
How to Monitor and Log Node.js Microservices Efficiently?
How to monitor and debug microservices effectively when issues arise in production?
When you’re dealing with multiple Node.js microservices, tracking down issues in production can be a challenge. Here is what you can do:
Solution:
The key is using centralized logging and monitoring tools with Kubernetes to get real-time insights into what’s happening across your services.
- Logging:
To efficiently gather logs from all your services, tools like the ELK stack (Elasticsearch, Logstash, Kibana) or Fluentd are great choices. These tools can collect and organize logs from all your microservices into one place, making it easier to troubleshoot issues. - Monitoring:
For monitoring the health and performance of your Node.js services, Prometheus and Grafana are powerful tools. Prometheus helps you gather metrics, while Grafana displays them in an easy-to-understand way.
Here’s an example of how you can expose Node.js metrics to Prometheus:const promClient = require('prom-client'); const collectDefaultMetrics = promClient.collectDefaultMetrics; collectDefaultMetrics(); app.get('/metrics', (req, res) => { res.set('Content-Type', promClient.register.contentType); res.end(promClient.register.metrics()); });This code collects default metrics from your Node.js app and exposes them at the /metrics endpoint. Prometheus can then scrape these metrics and store them for analysis.
With centralized logging and monitoring, you can easily track the health of your Node.js microservices, making it much quicker to identify and fix issues before they affect your users.
You May Also Read: Ready for Launch? How to Prepare Your Node.js Application for Production
Bottom Line
Managing Node.js microservices should not be complicated. With tools like Docker and Kubernetes, you can solve issues like environment inconsistencies and scaling challenges with ease. These tools are already making life easier for developers everywhere.
The real question isn’t “Should I use Docker and Kubernetes?” – it’s “How can these tools tackle my microservices challenges right now?”
Why Choose Capital Numbers for Node.js Development Services?
Development will not be more challenging when Capital Numbers is there by your side.
As a trusted, award-winning software development company, we deliver top-notch solutions as per your needs and budget. Whether it’s integrating microservices with Node.js, boosting performance, or scaling your app, we provide the right expertise to ensure your success.
Want to discuss your project needs? Book a free consultation today!

![]()