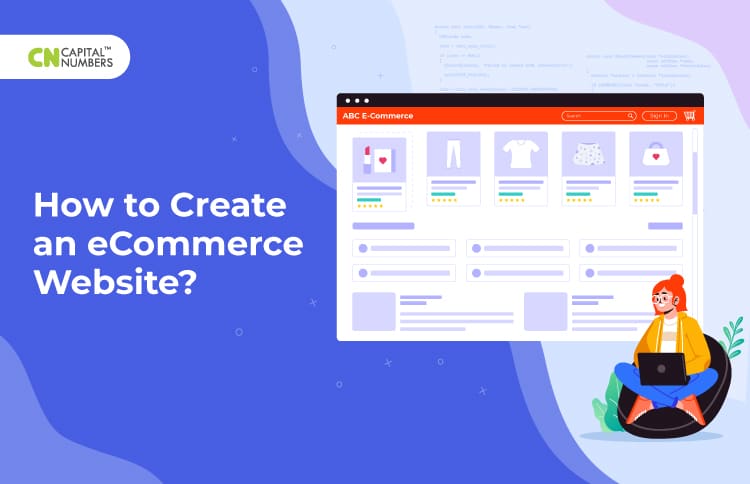
How to Create an eCommerce Website?
Table of Contents
- In the last six months, 83% of the US population has purchased from Amazon. (BigCommerce)
- Overall online stores generated 14.34 billion visits in March 2020, up from 12.81 billion global visits in January 2020. (Statista)
Stay-at-home orders during this coronavirus pandemic have led to this dramatic impact on online shopping.
Despite the reopening of physical stores, consumers remain leery. They prefer to embrace digital channels to purchase essentials and groceries. Even the older generations have become newly comfortable with online purchases, triggering a ‘tech tonic’ shift in overall consumer behavior. This has resulted in a never-seen-before eCommerce growth.
Businesses see an uptick in online traffic, search, and orders. Looking at this astounding growth in online buying, businesses can no longer downplay the importance of digital commerce. At a time like this, if you want to shift spend from offline to online, create a cutting-edge eCommerce store that helps your leads convert.
Let’s take a look at some of the key steps to creating an eCommerce store:
Choose Your Web Design Tools
For starters, it’s important to decide on the tools you want to use to code and design your eCommerce store. You can begin from scratch, which requires you to be proficient with MySQL, HTML, PHP, and other programming languages. Or you can invest in web design software like Microsoft Expression Web and Adobe Dreamweaver. This software ranges somewhere between $50 to $300. If you don’t have the budget, you can go for free options like BlueGriffon and KompoZer, which are powerful.
If the scale of your eCommerce store is small, then HTML/CSS is fine. If the store is meant to handle large data volumes, go for content management systems (CMSs) like Magento, Drupal, or WordPress. These CMSs would help you add new pages, edit the existing ones, and code new content effortlessly.
Do your research on the programming tools you need to power features like product catalogs, newsletter registrations forms, payment gateways, customer support widgets, etc.
Select Your Web Hosting Provider
Once you’ve zeroed down on the web design tools, decide where to host your eCommerce platform. There are plenty of web hosting providers out there – some are expensive, some are less costly. The cheapest hosts may skimp in other areas, run up charges through hidden fees, and fail to deliver optimum technical support. So choose wisely.
Moreover, MySQL and PHP are essential tools to create interactive eCommerce stores. So, pick a web host that’s compatible with these programming languages. Remember, access to an email server is critical nowadays, especially if you look to have email IDs that match your domain name.
Choose a hosting provider that offers uninterrupted customer support, provides frequent backups and delivers prompt services for technical glitches that may take place. Do not forget that host-based security services like firewalls are highly important.
Pick the Right Template
After selecting your hosting provider, decide on the eCommerce template. If you want to save time and don’t want to reinvent the wheel, go for a ready-made template. For a broad array of options, check out ThemeForest that has over 28000 website templates and interesting themes starting from $2.
Before finalizing your template, ask yourself questions like:
- What features do you want your eCommerce site to have?
- What kind of homepage do you prefer?
- How do you want your customers to navigate?
- Do you need an ‘About Us’ page, galleries, or maps?
Remember to choose a template design that’s clean and clutter-free. After all, a clunky navigation system is like a road with plenty of potholes and no street signs. So, choose your design wisely.
After you’ve settled on the template, you can go to your site’s admin section to customize it. You can customize just about anything such as:
- Texts
- Fonts
- Colors
- Images
- Positions of Products
- Social media integrations
and more.
Add Your Products
After you’ve selected a stylish and well-designed template, you need to add products. You can use an online store builder to manage your product pages. Here are a few builders that you can choose as per your budget:
| Builder | Weebly | Squarespace | Shopify | BigCommerce |
| Product Limit on Cheapest Ecommerce Plan | Unlimited | Unlimited | Unlimited | Unlimited |
| Price/month | $0 | $18 | $29 | $29.95 |
Once you’ve decided on the builder, upload your products. Keep in mind key factors like:
- Writing detailed product descriptions that sell.
- Adding high-quality images with a zoom option.
- Categorizing your product pages based on factors like brands, price ranges, sizes, etc.
In a nutshell, add your products in a manner that’s informative, engaging, and profit-generating.
Choose Your Payment Solution
Next, select a payment method to accept payments on your eCommerce website. There are two types of payment systems – a payment processor and a payment gateway.
Payment processors like Google Checkout and PayPal Website Payments Standard send the customer to the checkout page hosted by the payment processing company. After customers fill in their credit card details, then they get sent back to the eCommerce website. Taking customers away from your eCommerce site may create a little confusion for them and they might give second thoughts about completing their payments.
On the other hand, payment gateways like Authorize.net are integrated within your shopping cart to help customers complete their transactions securely without them leaving the eCommerce website. This ensures a smoother transaction process.
However, you must note that you need technical expertise to incorporate payment gateways. You should also obtain SSL certificates to secure your credit card transactions through payment gateways. On the other hand, if you use a payment processor, you needn’t worry about securing transactions since the processing company will take care of it.
Before choosing your payment method, check the fees that processors and gateways charge. For instance, PayPal charges 30 cents in addition to 2.9% of every transaction for merchants who get $3000 or less each month in payments. Whereas payment gateways cost between $99 to $299 for the setup and 10 to 50 cents per transaction.
Select Your Shopping Cart or Create Your Own
At physical stores, buyers pick items and put them in their shopping baskets or carts. After they’re done with their shopping, they bring their basket to the cashier to complete the payment process. Similarly, while developing your eCommerce website, you need to create your shopping cart solution. Your shopping cart solution must help people choose products from web pages, add them to their respective ‘cart’ and walk them through their payment process. Most shopping cart software packages include shipping fees and taxes to offer customers their total purchase amount.
There is an array of open-source carts like Zen Cart and osCommerce that you can choose from. This apart, you can create your shopping cart using Dreamweaver, or build it from the ground up using MySQL, PHP, and other web programs.
Check Your Shipping Services
Once you’ve decided on your shopping cart solution, you need to think about your shipping services.
To begin shipping, you need to add a shipping origin address to ensure the taxes and shipping charges are correct. Next, you need to decide the shipping zones that you plan to ship your products to. There are different shipping rates for customers residing in different countries and regions. For instance, if you’re a US-based eCommerce company, you might charge less from customers residing in a country close to the US as opposed to those residing in a country far away from the US.
Once you’ve decided on the shipping zone, choose the shipping option that you prefer, for instance, free shipping, flat rate, or rate by order price.
Next, partner with a courier company like UPS, USPS, FedEx, or any other to ensure smooth and hassle-free shipping services across regions and countries.
Preview, Test and Launch Your eCommerce Site
After you’ve successfully selected your design tools, web host, template, products, payment, shopping cart, and shipping service, you’re finally there. But before you publish, just go through the key points such as:
- Does the checkout work?
- Are the product settings correct?
- Are the shipping options working?
- Is the timezone right?
- Have you checked the site content?
- Does your store work on multiple browsers?
After you’ve thoroughly checked these above points and are satisfied with all of them, hit ‘publish.’
Remember, an excellent eCommerce site with seamless integrations will help you reach out to your potential customers faster. And at a time when the most profound behavioral pattern in retail is the shift to digital, it’s even more important for you to design an eCommerce store that genuinely works.
Summing Up
With billions of people holding up in their homes during this pandemic, eCommerce is likely to grow steadily. Online shopping habits formed now will persist in the future as well.
The time for businesses to lean in and understand the significant shifts in consumer behavior is now.
So, if you don’t incorporate cutting-edge eCommerce solutions now, there are high chances that your competitors will.
After all, eCommerce is here to stay. So, keep your platform ready.
For expert suggestions on eCommerce, call us.
Here’s to good business.