
What is OAuth, and How is It Used for API Authorization?
Table of Contents
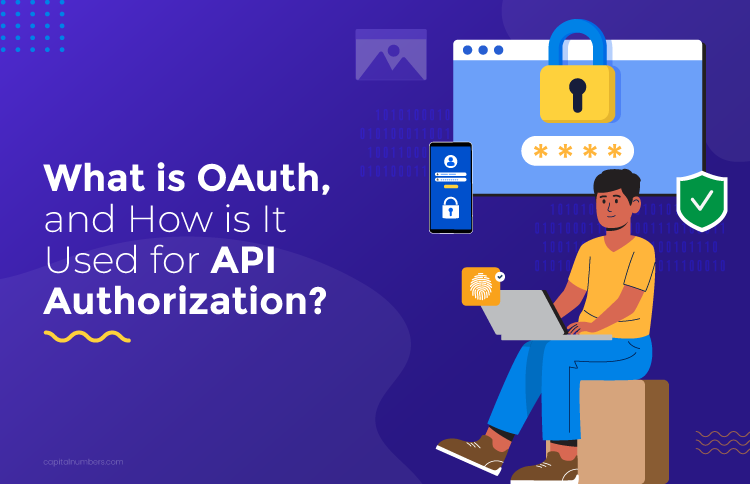
OAuth, or Open Authorization, is a popular framework that allows you to give applications permission to access your data without sharing your login credentials. It’s used for API authorization, helping developers control who can access specific data by providing tokens with set permissions, ensuring secure connections between services while keeping your information safe.
OAuth is becoming increasingly essential for API security, especially as the landscape of online services and integrations continues to expand. As the demand for scalable, secure applications grows, OAuth plays a vital role in the future of API development, offering a reliable method for securing API access and protecting sensitive user data.
Want to learn more? Here, we will explain what OAuth is, its key components, how it works, the benefits of using it for API authorization, best practices, and more. Keep reading to find out all the details!
What is OAuth?
OAuth is a system that lets you give apps permission to access your information without sharing your password. Instead of typing your username and password every time, OAuth uses special tokens to let apps access specific parts of your data securely. For example, when you connect a social media account to another app, OAuth lets that app use your account details without needing your password.
OAuth vs Other Authorization Protocols
OAuth:
- Allows apps to access data without sharing your password.
- Uses tokens that grant permission only to specific data, keeping your information secure.
- Commonly used for integrations with services like Google, Facebook, and others.
Basic Authentication:
- Requires your username and password for every request.
- Poses a higher risk because credentials are transmitted each time.
- Simple to implement but not as secure as OAuth.
Key Components of OAuth
OAuth is made up of several key components that ensure secure API authorization. Here’s a breakdown:
Resource Owner
The resource owner is typically the user who owns the data. They grant permission for an application to access their data (for example, a user allowing a third-party app to access their Google contacts).
Client
The client is the application or service that wants to access the user’s data. This could be a mobile app, web app, or desktop application that needs permission to interact with an API.
Authorization Server
The authorization server issues access tokens to the client after the user has authorized the request. It validates the user’s credentials and permissions before providing the token, managing the authentication and authorization process.
Resource Server
The resource server is where the user’s data is stored. It is the API server that responds to client requests once the access token is provided. It ensures that the access token is valid before granting access to the requested data.
Access Token
The access token is the key component that enables the client to access the protected resources on behalf of the user. It’s issued by the authorization server and sent with API requests to the resource server to verify access rights and enhance API performance.
Refresh Token
The refresh token allows the client to request a new access token once the current one expires. This helps maintain the connection without requiring the user to log in again. Refresh tokens are typically long-lived and stored securely.
Scopes
Scopes define the level of access granted to the client. When the user approves the app, they can specify which types of data or actions the app is allowed to access. For example, an app may request “read-only” access to the user’s email or “full access” to make changes to their profile.
Looking to integrate your app with external services?
At Capital Numbers, we provide robust API development and integration services that expand your app’s functionality and ensure smooth performance. Partner with us for expert solutions and top-tier service, delivered by our skilled professionals.
Why Use OAuth for API Authorization?
OAuth is a popular choice for API authorization because it offers several benefits that make it secure and easy to use:
Better Security
OAuth improves API security by using OAuth tokens instead of passwords, making it safer to share data with third-party apps. By following API security best practices, OAuth ensures that only trusted apps can access your information.
Granular Access Control
OAuth gives you more control over what data or actions third-party apps can access. Through scopes, users can limit what an app can do, providing secure API authorization and preventing unauthorized access to sensitive data.
Improved User Experience
OAuth streamlines the login process with API authorization methods like single sign-on (SSO). It allows users to log in once and gain access to multiple apps without needing to log in repeatedly. This improves convenience and reduces the hassle of remembering multiple passwords.
Flexibility for Developers
OAuth provides developers with a flexible way to grant controlled access to APIs. It allows developers to integrate third-party services without exposing sensitive information. This gives them more freedom in how they build and secure their apps.
OAuth 2.0 Grant Types for API Authorization
Below is a table that explains the most common OAuth 2.0 grant types used for API authorization. These grant types define how access tokens are issued and help secure communication between client applications and APIs.
| Grant Type | Use Case | Description |
|---|---|---|
| Authorization Code | Web apps with server-side logic | This flow is ideal for web applications that require user access. The user is redirected to an authorization server to grant permission, and the authorization code is exchanged for an OAuth token. |
| Client Credentials | Machine-to-machine (M2M) access | Used for server-to-server communication where no user is involved. The app obtains an access token using its client credentials (client ID and secret). |
| Password Grant (Legacy) | Direct username/password access (not recommended) | This flow involves directly collecting a user’s username and password to obtain an access token. It is now considered insecure and is not recommended for use. |
| Implicit Grant (Deprecated) | Browser-based apps (now replaced by PKCE) | Initially used for browser-based apps, but it is deprecated due to security concerns. It has been replaced by the more secure PKCE method for API authorization. |
| Device Code Flow | Devices without a browser (e.g., smart TVs, game consoles) | This flow allows devices with no browser or input method (such as smart TVs or consoles) to authenticate. The user enters a code on another device to complete the authentication and get an access token. |
How OAuth Works for API Authorization?
OAuth is a popular protocol for API authorization. But how does it work? Here’s a step-by-step breakdown:
Step 1: User Grants Permission (Authorization Request)
The OAuth process starts when a user is asked to grant permission to a third-party application. The app redirects the user to an authorization server to authenticate and approve access.
Example: The user is redirected to the authorization server with a URL that looks like this:
https://authorization-server.com/authorize?
response_type=code&
client_id=YOUR_CLIENT_ID&
redirect_uri=YOUR_REDIRECT_URI&
scope=read write&
state=random_state_value
- response_type=code: Indicates that the authorization code will be returned.
- client_id=YOUR_CLIENT_ID: The application’s client ID registered with the authorization server.
- redirect_uri=YOUR_REDIRECT_URI: The URL where the user will be redirected after granting access.
- scope: Specifies the permissions the application is requesting (e.g., “read”, “write”).
- state: A random value used to prevent CSRF attacks.
The user logs in to the authorization server and grants or denies access. If the user approves, the server redirects the user back to the application with an authorization code.
Step 2: Application Receives Authorization Code
After the user grants permission, the authorization server redirects the user back to the application’s redirect URI with an authorization code.
Example of Redirect:
https://yourapp.com/callback?code=AUTHORIZATION_CODE&state=random_state_value- code=AUTHORIZATION_CODE: The authorization code is passed to the app.
- state=random_state_value: Ensures that the request is legitimate and has not been tampered with.
The application now has the authorization code, which is valid for a short time.
Step 3: Application Requests Access Token (Token Request)
The application exchanges the authorization code for an access token by sending a POST request to the authorization server’s token endpoint. This is done by the application securely, without involving the user.
Example Request:
POST https://authorization-server.com/token
Content-Type: application/x-www-form-urlencoded

client_id=YOUR_CLIENT_ID&
client_secret=YOUR_CLIENT_SECRET&
code=AUTHORIZATION_CODE&
redirect_uri=YOUR_REDIRECT_URI&
grant_type=authorization_code
- client_id=YOUR_CLIENT_ID: The application’s client ID.
- client_secret=YOUR_CLIENT_SECRET: The client secret to authenticate the app with the authorization server.
- code=AUTHORIZATION_CODE: The authorization code received in the previous step.
- redirect_uri=YOUR_REDIRECT_URI: The same redirect URI used in the first request.
- grant_type=authorization_code: Specifies the authorization grant type.
The authorization server verifies the details and returns an access token (and optionally, a refresh token).
Example Response:
{
  "access_token": "ACCESS_TOKEN",
  "token_type": "bearer",
  "expires_in": 3600,
  "refresh_token": "REFRESH_TOKEN",
  "scope": "read write"
}
- access_token: The token that can be used to access the user’s protected resources.
- token_type: The type of token, typically “bearer”.
- expires_in: The time in seconds until the token expires.
- refresh_token: A token used to get a new access token when the current one expires (optional).
- scope: The permissions granted to the application.
Step 4: Accessing Protected Resources Using the Access Token
The application can now use the access token to make API requests on behalf of the user.
Example Request:
GET https://resource-server.com/api/userdata
Authorization: Bearer ACCESS_TOKEN
The access token is included in the Authorization header with the Bearer token type.
If the access token is valid, the resource server returns the requested data.
Example Response:
{
  "user_data": {
    "name": "John Doe",
    "email": "[email protected]"
  }
}
Step 5: Token Expiry and Refresh
Access tokens are typically short-lived for security reasons. When they expire, the application can use the refresh token (if available) to request a new access token without requiring the user to log in again.
Example Request to Refresh the Token:
POST https://authorization-server.com/token
Content-Type: application/x-www-form-urlencoded

client_id=YOUR_CLIENT_ID&
client_secret=YOUR_CLIENT_SECRET&
refresh_token=REFRESH_TOKEN&
grant_type=refresh_token
The server will respond with a new access token, allowing the application to continue accessing the user’s data without additional user involvement.
Example Response:
{
  "access_token": "NEW_ACCESS_TOKEN",
  "token_type": "bearer",
  "expires_in": 3600
}
Optimizing Car Auctions: Enhancing Efficiency and User Experience Through Technology
Learn more about our approach to optimizing car auction workflows [Read the case study here!]
OAuth vs API Keys vs JWTs: Key Differences for API Authorization
When choosing the right method for API authorization, it’s important to understand how OAuth compares to other options like API Keys and JWTs. Below is a comparison of the key features to consider:
| Feature | OAuth | API Keys | JWT |
|---|---|---|---|
| User Authentication | 
|

|
|
| Granular Access Control (Scopes) |
|
|
|
| Token Expiry |
|
|
|
| Revocable Tokens |
|
|
|
| Data Security (No Password Sharing) |
|
|
|
Best Practices to Follow When Using OAuth for API Authorization
When implementing OAuth for API authorization, following best practices is crucial for ensuring security and delivering a seamless user experience. Here are the OAuth best practices to keep in mind:
1. Secure Token Storage
Store OAuth tokens securely. Never keep them in locations like local storage or unencrypted databases. Instead, use HTTP-only cookies or encrypted storage to ensure the tokens are protected from unauthorized access.
2. Set Token Expiry and Use Refresh Tokens
Always assign expiration times to access tokens to limit the potential damage if they are compromised. Implement refresh tokens to ensure users can securely regain access without re-authenticating.
3. Validate Redirect URIs
Always validate redirect URIs to prevent attackers from redirecting users to malicious sites that could steal authorization codes or tokens. This simple step adds a crucial layer of protection.
4. Use Least Privilege for Scopes
Only request the OAuth scopes that are absolutely necessary for the application. Limiting the requested permissions reduces the risk of unnecessary exposure of sensitive user data.
5. Allow Token Revocation
Allow users to revoke OAuth tokens when needed, such as when they log out or change credentials. This ensures tokens are disabled immediately, preventing unauthorized access if the user’s session ends.
You May Also Read: Real-Time APIs: What They Are and Why They Matter
Bottom Line
OAuth plays a crucial role in securing API access while giving users more control over their data. By using OAuth, apps can interact with your information without needing to share passwords, making the process safer and more efficient. Following best practices ensures your application remains secure and provides a better user experience.
If you need help with API development or want to integrate OAuth for secure authorization, Capital Numbers is here to help. We offer solutions to build secure and scalable APIs. Get in touch with us today to see how we can assist you with your project!

![]()